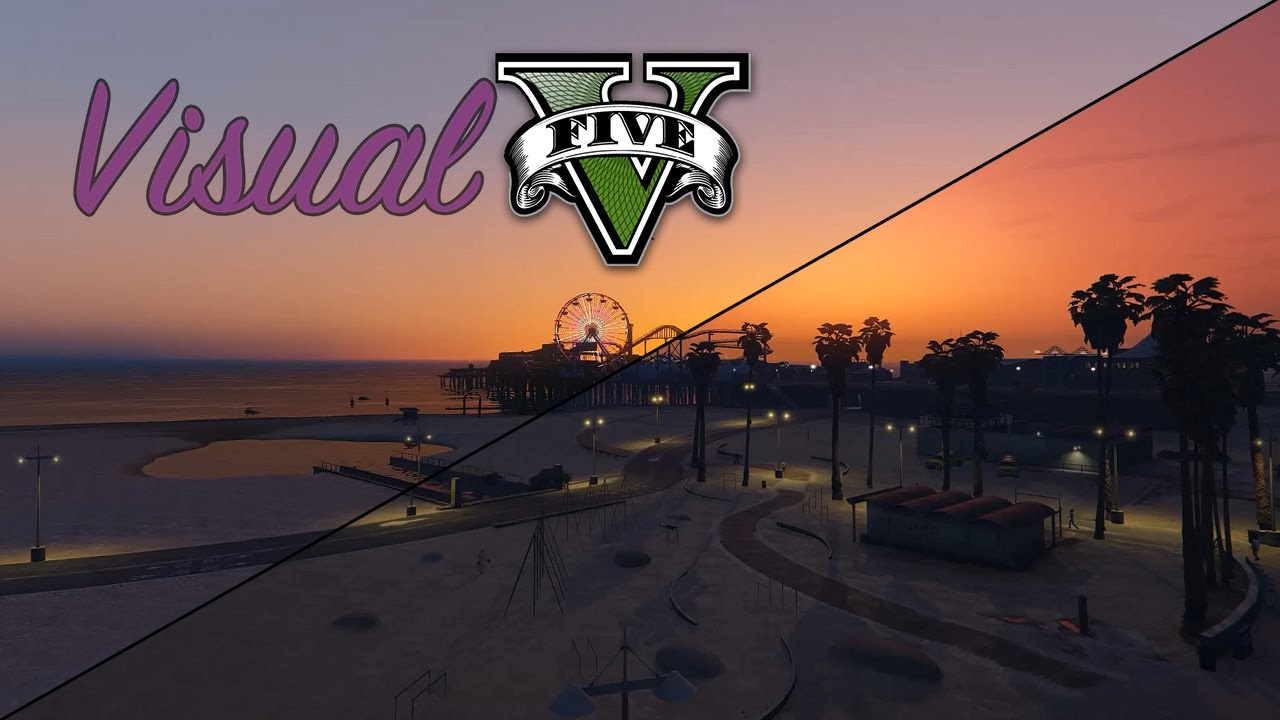
VisualV enhances the game’s lighting system to provide a more vibrant, realistic feel. It fine-tunes the weather effects, makes the colors pop, and adjusts the reflection quality for a more immersive experience. The mod does this while being optimized for performance, making it ideal for low-end PCs. With VisualV, you get a bright and colorful world without a massive hit on frame rates.

Read Also: Install Menyoo MOD in GTA 5 (latest)
How to Install VisualV
- Download VisualV: Head over to a trusted GTA V mod site, like GTA5-mods.com, and search for “VisualV.” Download the mod files to your PC.
- Install OpenIV: To install VisualV, you need OpenIV, a tool used to modify the game files. If you don’t already have it, download and install it from OpenIV.com.
- Activate Edit Mode in OpenIV: Open OpenIV, select GTA V (Windows version), and activate “Edit Mode” by clicking the button at the top of the window.
- Navigate to Your GTA V Directory: In OpenIV, find the folder where GTA V is installed on your PC. This is usually located in
C:\Program Files\Rockstar Games\Grand Theft Auto V. - Drag and Drop Files: Extract the VisualV files from the downloaded .zip folder. In OpenIV, navigate to the “mods” folder in your GTA V directory, then drag and drop the VisualV files into the appropriate locations as specified in the installation instructions.
- Install Optional Enhancements: VisualV may come with additional settings or optional files, like ENB presets. These can further improve the visuals but may affect performance. Be sure to check the mod description for recommendations on what works best for low-end PCs.
- Launch GTA V: Once everything is set, close OpenIV and start GTA V. You should immediately notice more colorful and vivid graphics, with a minimal impact on your PC’s performance.
VisualV 1.0.590: Click Here
![Gameconfig For Limitless Vehicles Version 1.0.350.1[1.36]](https://blogger.googleusercontent.com/img/b/R29vZ2xl/AVvXsEj-5B0hP52P2X97-pcmjnHokBYXFU8ZAfeeXhke4rbhloQAX_Gsu0MqoTQV4hzzp8x6m3HOkL1a_92lBzcsdbeCn0EwOryn9cOsRqA6IXHZd-ITqmtqXTE-mfdiObVHmVyRLj-gBtV5wd5BTTtA1evHSgeqhIIVXi0o3aAbI_Pr_7TmZxOjnBKssoC9dwE/w72-h72-p-k-no-nu/Gameconfig%20For%20Limitless%20Vehicles%20Version%201.0.350.1%5B1.36%5D.webp)
.webp)


.webp)